| Workshop | Empennage | Wings | Fuselage | Contact |
| <-- October 2012 | December 2012 --> |
Chronological Updates, November, 2012
3 Nov 2012
Robb came by last week and helped me put in one of the interior ribs in the right fuel tank. We had a few problem rivets that had to be drilled out, and Scott came by and helped me fix those up.
Scott came by again this weekend and, in a 4-hour marathon, we finished riveting the other four interior ribs.
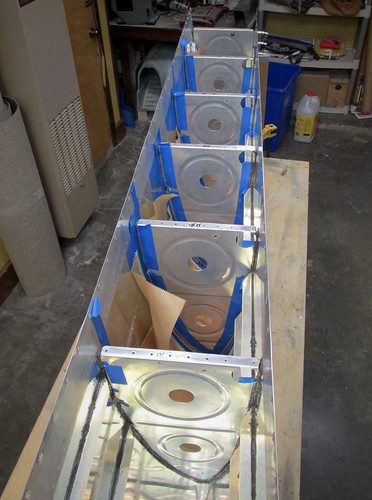
There is still one bad rivet that has already been drilled out but that I will require assistance with to get re-bucked. Other than that, I've got a bunch of work ahead on this fuel tank that doesn't require assistance. I may bring someone in to help with the J-stiffener install, though I could probably manage by myself. But seeing as I need help getting that one rivet redone, I might as well combine that with having someone speed up the J-stiffener application.
There were three instances during the riveting of the ribs where the bucking bar was dropped onto the skin, two of which left noticeable dents in the skin material. I've purchased a panel beating hammer and a small shot bag so that I can flatten out the dents, but they haven't arrived yet. I won't be able to seal up the aft baffle on the tank until I've taken care of the dents. So there may be a bit of a delay.
In other news, I've started prepping the right fuel tank skin for final assembly. It was left in a state of having been match-drilled but basically nothing else. I've now deburred all of the inside holes. Remaining tasks on that piece prior to beginning the sealant/riveting work on the right tank are:
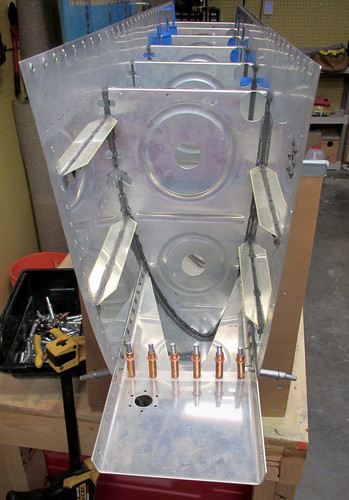
4 Nov 2012 I went ahead and squeezed the outboard rib onto the right fuel tank as well as the fuel tank attach bracket. The bracket had to be bucked, but it is reasonably straightforward to do this solo. Here's the bracket in place:
And here's the outboard rib, still needing the big fillet of sealant at the nose bend:
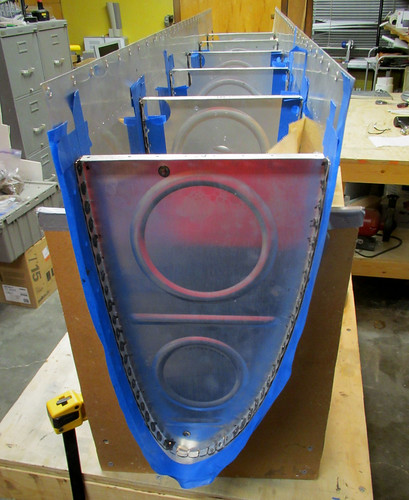
Somehow I managed to put some masking tape on the bracket that ended up between the bracket and the tank skin, and not notice that until I had riveted the pieces together. So now there's some integral tape in my project. I'll put some extra sealant around the inner fillet in this area to make sure the tape isn't a conduit for leaks. <facepalm>
Remaining tasks for the right fuel tank, in the order they must be done:
There are a couple of steps there that are on hold for equipment or tools that I've ordered that havn't shown up yet. Given that the shot back is backordered, if I can't find one to borrow there may be a delay before I can get the aft baffle on this thing. But regardless, progress has been made recently! I'm almost out of the hideous morass that is the fuel tank chapter.
23 Nov 2012
The website has been down for awhile due to the hurricane in NYC where the server was housed, but it is now back.
I've been slowly working on getting all of the internal sealant squared away in preparation for closing up the right tank. I was waiting for the fuel level sender and panel-beating supplies to arrive, and they're all here except for the lead shot. Once I can find some shot and clear out the dent in my skin I'll be ready to put the aft inboard rib in place and close up the right tank for good.
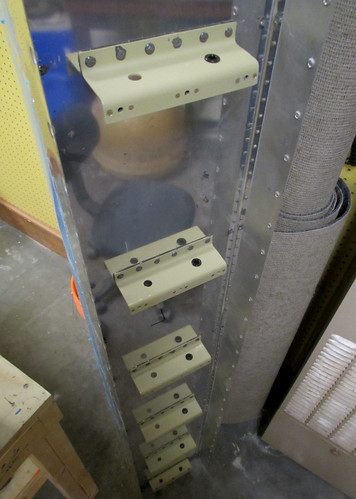
I'm contemplating running the stall warning wires and aux connector video lines from the left outboard leading edge into the wing root forward of the spar. To do this, I'll run wires through the holes in the left tank Z-attach brackets. In preparation for this possibility, I popped some snap bushings into place on the left tank. They look like this:
Also, I ordered all the wires I'll need for wiring up both wings from Stein Air and, on a whim, I wrote "Draw a dragon on the box!" in the order comments field of my online order. This is what arrived:
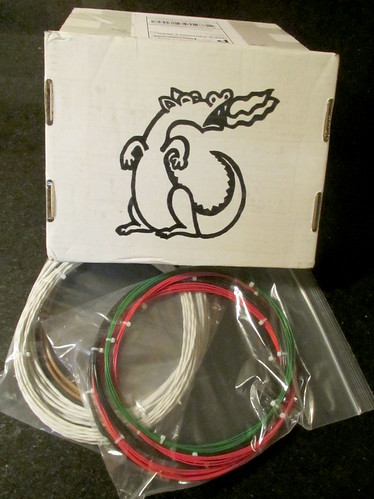
NICE! Way better artisanship than I would have expected. I cut out that side of the box and hung it up in my shop. Stein Air, you have a customer for life (if perhaps for the wrong reasons).
There is still one bad rivet that has already been drilled out but that I will require assistance with to get re-bucked. Other than that, I've got a bunch of work ahead on this fuel tank that doesn't require assistance. I may bring someone in to help with the J-stiffener install, though I could probably manage by myself. But seeing as I need help getting that one rivet redone, I might as well combine that with having someone speed up the J-stiffener application.
There were three instances during the riveting of the ribs where the bucking bar was dropped onto the skin, two of which left noticeable dents in the skin material. I've purchased a panel beating hammer and a small shot bag so that I can flatten out the dents, but they haven't arrived yet. I won't be able to seal up the aft baffle on the tank until I've taken care of the dents. So there may be a bit of a delay.
In other news, I've started prepping the right fuel tank skin for final assembly. It was left in a state of having been match-drilled but basically nothing else. I've now deburred all of the inside holes. Remaining tasks on that piece prior to beginning the sealant/riveting work on the right tank are:
- Remove vinyl from rivet lines on outer faces
- Debur outer holes
- Scuff contact areas on inner faces
- Clean inner faces
- Dimple all holes
4 Nov 2012 I went ahead and squeezed the outboard rib onto the right fuel tank as well as the fuel tank attach bracket. The bracket had to be bucked, but it is reasonably straightforward to do this solo. Here's the bracket in place:
And here's the outboard rib, still needing the big fillet of sealant at the nose bend:
Somehow I managed to put some masking tape on the bracket that ended up between the bracket and the tank skin, and not notice that until I had riveted the pieces together. So now there's some integral tape in my project. I'll put some extra sealant around the inner fillet in this area to make sure the tape isn't a conduit for leaks. <facepalm>
Remaining tasks for the right fuel tank, in the order they must be done:
- Rivet the J-stiffener in place
- Fabricate and install the vent tube
- Mount accessories to the aft inboard rib (on hold pending arrival of fuel level sensor)
- Rivet the aft inboard rib in place
- Repair the dimpled skin from the bucking bar drops (on hold pending arrival of panel beating hammer and shot bag)
- Do the Kool-Aid leak check
- Rivet the aft baffle in place
- Allow sealant to cure for at least a week
- Countersink and install rivets in the 20 guide pin holes
- Pressure test the tank
There are a couple of steps there that are on hold for equipment or tools that I've ordered that havn't shown up yet. Given that the shot back is backordered, if I can't find one to borrow there may be a delay before I can get the aft baffle on this thing. But regardless, progress has been made recently! I'm almost out of the hideous morass that is the fuel tank chapter.
23 Nov 2012
The website has been down for awhile due to the hurricane in NYC where the server was housed, but it is now back.
I've been slowly working on getting all of the internal sealant squared away in preparation for closing up the right tank. I was waiting for the fuel level sender and panel-beating supplies to arrive, and they're all here except for the lead shot. Once I can find some shot and clear out the dent in my skin I'll be ready to put the aft inboard rib in place and close up the right tank for good.
I'm contemplating running the stall warning wires and aux connector video lines from the left outboard leading edge into the wing root forward of the spar. To do this, I'll run wires through the holes in the left tank Z-attach brackets. In preparation for this possibility, I popped some snap bushings into place on the left tank. They look like this:
Also, I ordered all the wires I'll need for wiring up both wings from Stein Air and, on a whim, I wrote "Draw a dragon on the box!" in the order comments field of my online order. This is what arrived:
NICE! Way better artisanship than I would have expected. I cut out that side of the box and hung it up in my shop. Stein Air, you have a customer for life (if perhaps for the wrong reasons).
| <-- October 2012 | December 2012 --> |