| Workshop | Empennage | Wings | Fuselage | Contact |
| <-- January 2012 | March 2012 --> |
Chronological Updates, February, 2012
2 Feb 2012
Got a few more deburring tasks done on the main wing body. Most importantly, finished off the aft row of holes on both flanges of the right main spar so that it could go back into the garage for storage until the wing is ready for assembly. Next I knocked out the right rear spar and got it fully deburred, so now it's in storage too. The wing walk doublers and all of the small parts associated with the rear spar are also complete, leaving only the right wing skins left before it is time to prime on the main wing body.
3 Feb 2012
I had left the right aileron not quite ready for priming way back when I last worked on them; not sure why. Today I did the last few remaining tasks so that now both ailerons are on hold awaiting a priming pass. This included removing the vinyl stripes from the nose skin, scuffing the inner surface of the nose skin, deburring the nose skin, dimpling the nose skin, and countersinking the trailing edge.
4 Feb 2012
Enjoying a break from deburring work on the main wing skins, I decided to start the right flap.
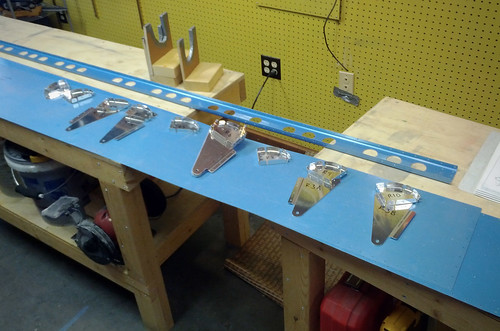
I started by creating all of the skeleton pieces forward of the spar and match-drilling them all together. This included the 10 nose ribs, six flap hinge hanger halves, and several spacers. I went ahead and deburred all of the edges of these parts as well as the holes that they shared (all holes except the skin and spar holes which haven't been drilled yet). With that done, I went ahead and assembled the entire right flap skeleton in preparation for match-drilling the connections to the spar.
Didn't have time to do the actual match drilling before I had to leave for a dinner party. And now I'm going on a business trip for a couple weeks (again), so progress will resume in late February. Cheers!
19 Feb 2012
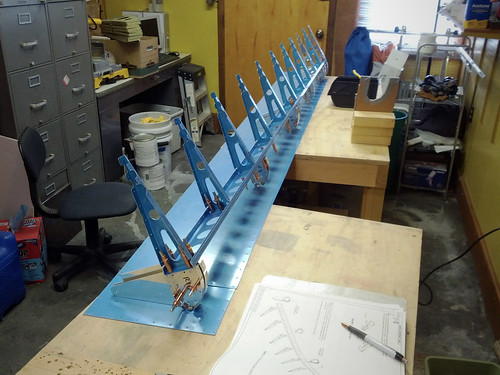
Back in town, I got back to work on the right flap. First thing to do was match-drill all of the holes in the spar. After that, I attached all four skins and the trailing edge extrusions.
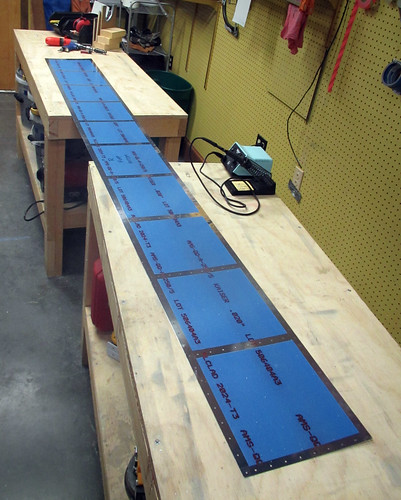
All holes in the skins were match-drilled into the skeleton, and the aft flanges of the three hinge hangars were match drilled. In the photo above you can see that I used three 2" C clamps to keep the flanges flat up against each other as I match drilled.
With all of the match drilling complete, I disassembled the entire flap and started on the deburring and dimpling phase. I got all of the main ribs and nose ribs done and ready for priming. Also countersunk the hing hanger halves, so they're ready for primer as well. The only tasks left on the right flap prior to chemistry are now:
Looking ahead in the plans, I noticed that the first few riveting steps in the flaps involve only nose rib pieces—and all of the nose rib pieces for the left flap were already primed! So I skipped ahead and did a bit of final assembly becase it's way more fun than deburring or countersinking.
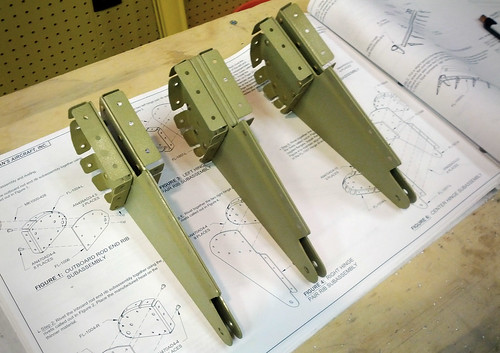
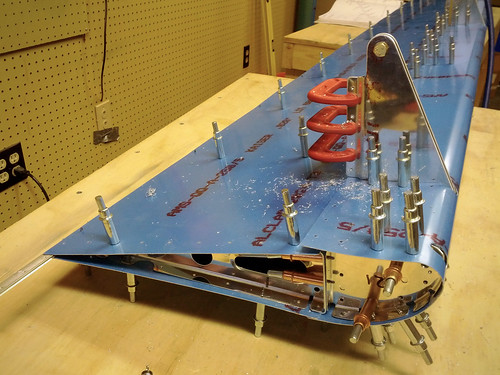
Here's the three left flap hinge hanger sub assemblies fully riveted. The middle one, with its big metal slabs in the middle, used -10 rivets which are the second-longest rivets in the wings! They were way too big for my squeezer so I had to shoot them with the rivet gun.
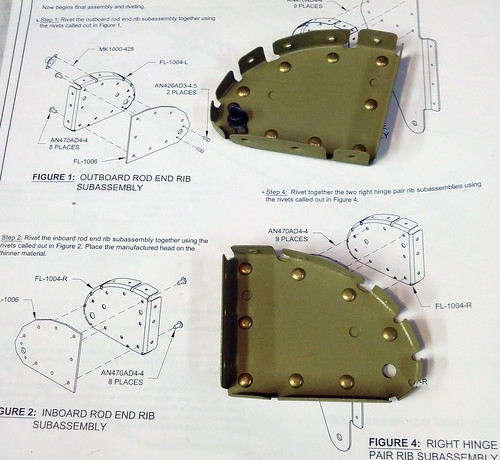
And here's the rod end ribs, the inboard-most ribs in the left flap. That's as far as I could go with already-primed parts, so now I'm resigned to continue the deburring and dimpling. Boo.
20 Feb 2012
I had a stack of assorted parts that needed deburring and/or dimpling before they'd be ready for the final wing priming extravaganza. I decided that today, being a holiday and not having to go to work, I would make as much of a dent in this deburring and dimpling as I could. By the end of the day, I had finished off all of the gap fairings, all of the J stiffeners, the flap spars, one of the four trailing edge extrusions, and had started in on the skins—all but finishing one of the aft flap skins (it just needs to be dimpled, and I'll wait for a hand with that).
The remaining tasks prior to the next priming pass are all now almost all skin-related. In addition to countersinking the three remaining trailing edge pieces, I have:
26 Feb 2012
It has been a week of much deburring.
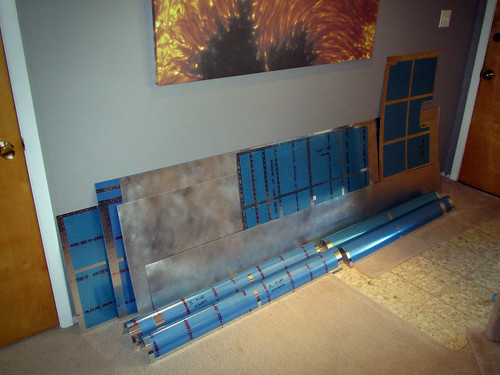
I told myself I was going to finish deburring at least one piece of either flap or wing skin every day after work and I stuck to it. The result was that this morning I finished the last of the pile of skins you see here.
That is all of the wing body skins plus all of the flap skins. The holes are all deburred on both sides, the vinyl is removed where it needs to be, and the inner surfaces have been scuffed and cleaned. The only things they need now prior to final assembly are lap joint tapers for the wing body skins, dimpling, edge deburring (which is quick), and primer.
I started with the lap joint tapers. I tried to recreate a setup like this one from Tim Olson's project, and was basically successful. I tried a 100 grit sanding wheel on my pneumatic random orbital sander at first but it wasn't chewing through the metal fast enough, so I replaced it with a 60 grit and got better results. If I had had a coarser disc I would have used it; it still took awhile with the 60.
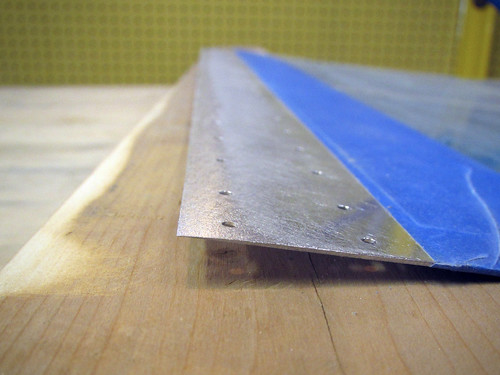
The results are a bit more abrupt than were called for in the plans, but as this is a purely aesthetic point anway and any residual ridge on the lap joints can be remediated with a quick hit of filler prior to painting, I'm not too concerned.
With this out of the way, it was time to dimple. Most of the pieces still left are somewhat unwieldy for one person, though I was able to dimple all four of the flap nose skins by myself. For the larger pieces, I had Jeremy give me a hand supporting the long end while I ran the dimpler. We worked through all four of the flap aft skins before calling it a day. The remaining task list for skins is now
One other thing that happened recently was an order in to Van's, primarily to get tank sealant for the fuel tanks whose final assembly should begin very soon now. Along with the sealant I purchased replacement torque tube parts from the aileron actuation chapter which I had screwed up on a few months ago with a bad drill hole. I was more careful with the drilling this time through and got results that I am very happy with.
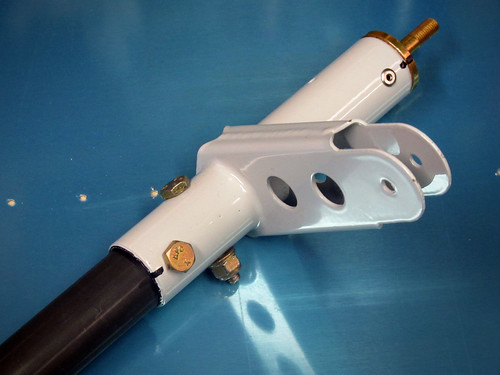
The holes are round, perpendicular to the tube, and perpendicular to each other. Perfect! Unfortunately I neglected to get a new rod end for the smaller bellcrank-to-aileron pushrods so I couldn't redo that part (which was also bad, for the same reason). It'll come with my next order to Van's (sometime prior to priming).
Got a few more deburring tasks done on the main wing body. Most importantly, finished off the aft row of holes on both flanges of the right main spar so that it could go back into the garage for storage until the wing is ready for assembly. Next I knocked out the right rear spar and got it fully deburred, so now it's in storage too. The wing walk doublers and all of the small parts associated with the rear spar are also complete, leaving only the right wing skins left before it is time to prime on the main wing body.
3 Feb 2012
I had left the right aileron not quite ready for priming way back when I last worked on them; not sure why. Today I did the last few remaining tasks so that now both ailerons are on hold awaiting a priming pass. This included removing the vinyl stripes from the nose skin, scuffing the inner surface of the nose skin, deburring the nose skin, dimpling the nose skin, and countersinking the trailing edge.
4 Feb 2012
Enjoying a break from deburring work on the main wing skins, I decided to start the right flap.
I started by creating all of the skeleton pieces forward of the spar and match-drilling them all together. This included the 10 nose ribs, six flap hinge hanger halves, and several spacers. I went ahead and deburred all of the edges of these parts as well as the holes that they shared (all holes except the skin and spar holes which haven't been drilled yet). With that done, I went ahead and assembled the entire right flap skeleton in preparation for match-drilling the connections to the spar.
Didn't have time to do the actual match drilling before I had to leave for a dinner party. And now I'm going on a business trip for a couple weeks (again), so progress will resume in late February. Cheers!
19 Feb 2012
Back in town, I got back to work on the right flap. First thing to do was match-drill all of the holes in the spar. After that, I attached all four skins and the trailing edge extrusions.
All holes in the skins were match-drilled into the skeleton, and the aft flanges of the three hinge hangars were match drilled. In the photo above you can see that I used three 2" C clamps to keep the flanges flat up against each other as I match drilled.
With all of the match drilling complete, I disassembled the entire flap and started on the deburring and dimpling phase. I got all of the main ribs and nose ribs done and ready for priming. Also countersunk the hing hanger halves, so they're ready for primer as well. The only tasks left on the right flap prior to chemistry are now:
- Deburr and dimple skins (x4)
- Deburr and dimple spar
- Countersink trailing edge extrusions (x2)
Looking ahead in the plans, I noticed that the first few riveting steps in the flaps involve only nose rib pieces—and all of the nose rib pieces for the left flap were already primed! So I skipped ahead and did a bit of final assembly becase it's way more fun than deburring or countersinking.
Here's the three left flap hinge hanger sub assemblies fully riveted. The middle one, with its big metal slabs in the middle, used -10 rivets which are the second-longest rivets in the wings! They were way too big for my squeezer so I had to shoot them with the rivet gun.
And here's the rod end ribs, the inboard-most ribs in the left flap. That's as far as I could go with already-primed parts, so now I'm resigned to continue the deburring and dimpling. Boo.
20 Feb 2012
I had a stack of assorted parts that needed deburring and/or dimpling before they'd be ready for the final wing priming extravaganza. I decided that today, being a holiday and not having to go to work, I would make as much of a dent in this deburring and dimpling as I could. By the end of the day, I had finished off all of the gap fairings, all of the J stiffeners, the flap spars, one of the four trailing edge extrusions, and had started in on the skins—all but finishing one of the aft flap skins (it just needs to be dimpled, and I'll wait for a hand with that).
The remaining tasks prior to the next priming pass are all now almost all skin-related. In addition to countersinking the three remaining trailing edge pieces, I have:
- 3 aft flap skins
- 4 forward flap skins
- 4 right wing skins
26 Feb 2012
It has been a week of much deburring.
I told myself I was going to finish deburring at least one piece of either flap or wing skin every day after work and I stuck to it. The result was that this morning I finished the last of the pile of skins you see here.
That is all of the wing body skins plus all of the flap skins. The holes are all deburred on both sides, the vinyl is removed where it needs to be, and the inner surfaces have been scuffed and cleaned. The only things they need now prior to final assembly are lap joint tapers for the wing body skins, dimpling, edge deburring (which is quick), and primer.
I started with the lap joint tapers. I tried to recreate a setup like this one from Tim Olson's project, and was basically successful. I tried a 100 grit sanding wheel on my pneumatic random orbital sander at first but it wasn't chewing through the metal fast enough, so I replaced it with a 60 grit and got better results. If I had had a coarser disc I would have used it; it still took awhile with the 60.
The results are a bit more abrupt than were called for in the plans, but as this is a purely aesthetic point anway and any residual ridge on the lap joints can be remediated with a quick hit of filler prior to painting, I'm not too concerned.
With this out of the way, it was time to dimple. Most of the pieces still left are somewhat unwieldy for one person, though I was able to dimple all four of the flap nose skins by myself. For the larger pieces, I had Jeremy give me a hand supporting the long end while I ran the dimpler. We worked through all four of the flap aft skins before calling it a day. The remaining task list for skins is now
- Dimple 8 wing body skins
- Edge deburr all flap skins and wing body skins
One other thing that happened recently was an order in to Van's, primarily to get tank sealant for the fuel tanks whose final assembly should begin very soon now. Along with the sealant I purchased replacement torque tube parts from the aileron actuation chapter which I had screwed up on a few months ago with a bad drill hole. I was more careful with the drilling this time through and got results that I am very happy with.
The holes are round, perpendicular to the tube, and perpendicular to each other. Perfect! Unfortunately I neglected to get a new rod end for the smaller bellcrank-to-aileron pushrods so I couldn't redo that part (which was also bad, for the same reason). It'll come with my next order to Van's (sometime prior to priming).
| <-- January 2012 | March 2012 --> |