
| Workshop | Empennage | Wings | Fuselage | Contact |
| <-- December 2011 | February 2012 --> |
Chronological Updates, January, 2012
21 Jan 2012
Spent the first two weeks of this month on a business trip, but today I got back to work on the plane. I decided that the left wing lap joint work would be best saved for when I could do all four pieces at once. This precluded me from doing any of the dimpling on the left skins as well, so I shelved all of the left wing parts and started on the right wing!
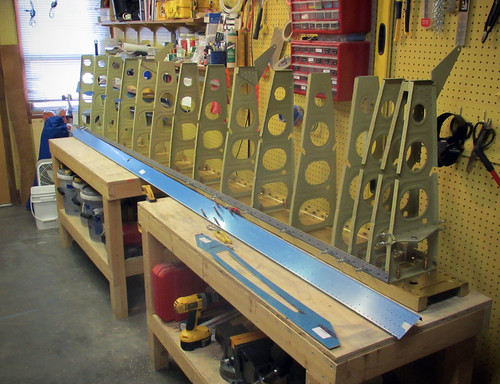
I pulled the main spar out of the garage and got it set up on the workbenches. Attaching the 15 ribs went quickly, then I set to work on the rear spar parts. These also took little time, then everything was cleco'd together and the top skins were hung:

The next step is to match-drill all of these holes, which was a formidable-enough barrier that it made for a good stopping point.
22 Jan 2012
Followed up yesterday's work by hanging the bottom skins on the ribs and adding the gap fairings and stiffener. This made for a more-or-less fully-assembled right wing body, so I started in on the match drilling. I did all of the top skin holes including all of the countersinking above the wing walk doublers. Also match drilled all of the gap fairing holes. I called it a day before working on the bottom skins as all of the drilling and cleco work had put some blisters into my hands. Nothing worth photographing...
23 Jan 2012
A friend of mine with a long trailer was recently doing a run to the local home store so I tagged along and picked up some lumber for the wing cart. It was a nice day out today, so I went out and cut the ten foot lengths of 2x4 to length. I'm using a design I found on Matronics, and I've since lost the attribution. All I have is an image I copied off the forums:
 Click for a full-sized version. If that's your design, drop me a line and I'll give you credit here.
If you'd like to build a cart like this one, here's what you'll need to buy or find laying around:
Updated 2012.02.05 -- error in measurements
The 9" piece goes between the two vertical posts between the two wings at the wingtip end of the cart. The 11.75" pieces go perpendicular to and beneath the wings between the vertical posts at the wingtip end. Remember when comparing these dimensions to the diagram above that a 2x4 is actually 1.5" x 3.5" in cross section.
For now, I just have a bunch of cut pieces of lumber in a pile and four heavy-duty caster wheels.
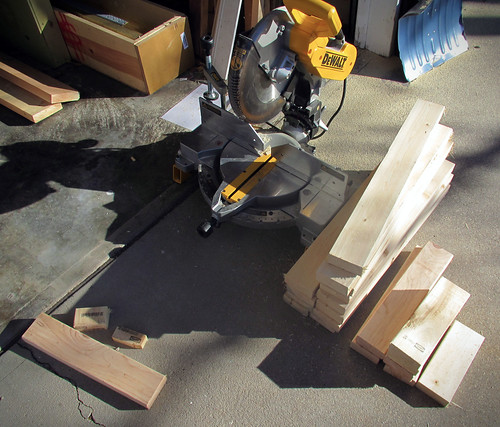
I need to find a strip of carpet, but I'm still a long ways from needing the actual cart built anyway. This was just a get-ahead project for a sunny afternoon.
30 Jan 2012
Spent a few hours today finishing up the match-drilling on the right wing. Did all of the bottom skin holes, finished up the rear spar holes, gap fairing holes, and the outboard aileron bracket attachment. The right wing is going to be a lot simpler internally than the left was because it doesn't have the pitot tube mount or plumbing or the stall warning (and co-located accessory connector) wiring. Everything that is planned to be located in the right wing can have its wiring run through the standard 3/4" conduit. The only special item is the OAT sensor, which I am planning to located just aft of the middle inspection plate. Because it's just a small round hole with a reasonably trivial wiring installation in an easy-to-access location, I'm planning to install it after the wing is mostly built.
The autopilot servo goes in the right wing at the aileron bellcrank, but I can't do much on that until I know for certain which servos I'm going to use. I was planning on using the Trio Gold servo with MGL's Odyssey EFIS built-in autopilot, and I purchased a drop-in replacement for the bellcrank mount that holds the Trio servo. However, it looks like MGL is transitioning to an in-house servo with different mounting requirements for their new iEFIS lineup that is expected to be out well before I get to the point of populating my control panel. Thus, I'm on-hold for the servo mounting hardware and modifications.
Having decided all of that, there were no custom modifications to be made on the right wing at this time, so I took it all apart and let the deburring fiesta begin. I took care of a bunch of holes on the smaller parts and the inner holes along the aft flanges of the main spar until the cordless screwdriver ran out of batteries, then called it a day. Here's a run-down of work remaining for the wing main bodies prior to priming:
Spent the first two weeks of this month on a business trip, but today I got back to work on the plane. I decided that the left wing lap joint work would be best saved for when I could do all four pieces at once. This precluded me from doing any of the dimpling on the left skins as well, so I shelved all of the left wing parts and started on the right wing!
I pulled the main spar out of the garage and got it set up on the workbenches. Attaching the 15 ribs went quickly, then I set to work on the rear spar parts. These also took little time, then everything was cleco'd together and the top skins were hung:
The next step is to match-drill all of these holes, which was a formidable-enough barrier that it made for a good stopping point.
22 Jan 2012
Followed up yesterday's work by hanging the bottom skins on the ribs and adding the gap fairings and stiffener. This made for a more-or-less fully-assembled right wing body, so I started in on the match drilling. I did all of the top skin holes including all of the countersinking above the wing walk doublers. Also match drilled all of the gap fairing holes. I called it a day before working on the bottom skins as all of the drilling and cleco work had put some blisters into my hands. Nothing worth photographing...
23 Jan 2012
A friend of mine with a long trailer was recently doing a run to the local home store so I tagged along and picked up some lumber for the wing cart. It was a nice day out today, so I went out and cut the ten foot lengths of 2x4 to length. I'm using a design I found on Matronics, and I've since lost the attribution. All I have is an image I copied off the forums:
Click for a full-sized version. If that's your design, drop me a line and I'll give you credit here.
If you'd like to build a cart like this one, here's what you'll need to buy or find laying around:
- 4 castering wheels
- 2 2x6x10'
- 3 2x4x10'
- 1 2x4x8'
- 1 16" x 8' length of carpet
| 10' | 28" | 28" | 28" | 24" | 9" |
|---|---|---|---|---|---|
| 10' | 28" | 24" | 24" | 24" | 16" |
| 10' | 24" | 24" | 23.75" | 23.75" | 16" |
| 8' | 23.75" | 10.25" | 10.25" | 10.25" | 10.25 |
The 9" piece goes between the two vertical posts between the two wings at the wingtip end of the cart. The 11.75" pieces go perpendicular to and beneath the wings between the vertical posts at the wingtip end. Remember when comparing these dimensions to the diagram above that a 2x4 is actually 1.5" x 3.5" in cross section.
For now, I just have a bunch of cut pieces of lumber in a pile and four heavy-duty caster wheels.
I need to find a strip of carpet, but I'm still a long ways from needing the actual cart built anyway. This was just a get-ahead project for a sunny afternoon.
30 Jan 2012
Spent a few hours today finishing up the match-drilling on the right wing. Did all of the bottom skin holes, finished up the rear spar holes, gap fairing holes, and the outboard aileron bracket attachment. The right wing is going to be a lot simpler internally than the left was because it doesn't have the pitot tube mount or plumbing or the stall warning (and co-located accessory connector) wiring. Everything that is planned to be located in the right wing can have its wiring run through the standard 3/4" conduit. The only special item is the OAT sensor, which I am planning to located just aft of the middle inspection plate. Because it's just a small round hole with a reasonably trivial wiring installation in an easy-to-access location, I'm planning to install it after the wing is mostly built.
The autopilot servo goes in the right wing at the aileron bellcrank, but I can't do much on that until I know for certain which servos I'm going to use. I was planning on using the Trio Gold servo with MGL's Odyssey EFIS built-in autopilot, and I purchased a drop-in replacement for the bellcrank mount that holds the Trio servo. However, it looks like MGL is transitioning to an in-house servo with different mounting requirements for their new iEFIS lineup that is expected to be out well before I get to the point of populating my control panel. Thus, I'm on-hold for the servo mounting hardware and modifications.
Having decided all of that, there were no custom modifications to be made on the right wing at this time, so I took it all apart and let the deburring fiesta begin. I took care of a bunch of holes on the smaller parts and the inner holes along the aft flanges of the main spar until the cordless screwdriver ran out of batteries, then called it a day. Here's a run-down of work remaining for the wing main bodies prior to priming:
- Deburr right skin holes
- Deburr right aft spar holes
- Deburr right wing walk doubler holes
- Deburr all right wing piece edges
- Scuff inner surfaces for all right wing skins
- Remove rivet line vinyl for all right wing skins
- Sand down lap joint edges on all skins, left and right
- Dimple all wing parts, left and right
| <-- December 2011 | February 2012 --> |