
| Workshop | Empennage | Wings | Fuselage | Contact |
| <-- December 2010 | February 2011 --> |
Chronological Updates, January, 2011
5 Jan 2011
I've done a lot of work over the last few days, though most of it was deburring which is super boring and not terribly photogenic.
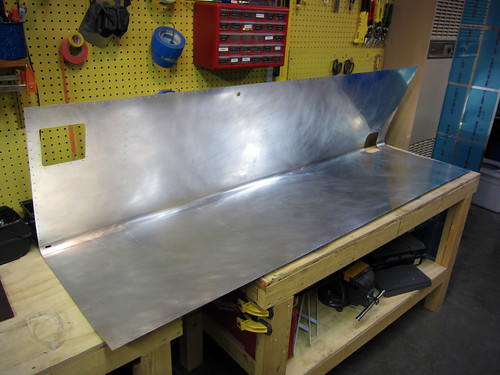
For starters, I got a prompt reply from the Duckworks folks who informed me that the position of the piece in the last photo of the previous post was accurate, so I went ahead and finished off the two lower lens retainer brackets. I also used the body saw to cut open the stall warning access hatch cover.
The doubler fits perfectly in the opening; I had to modify a couple of the corners to make the access hatch cover fit without modifications. I'd like to be able to use a stock cover in case I ever need to replace it (or need a second one to build a camera or sensor into).
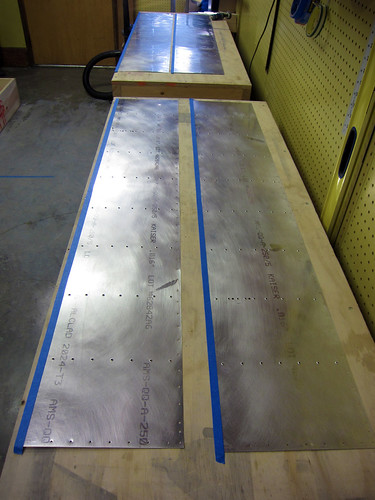
Knowing that dimpling was coming up, I went ahead and removed the vinyl lines from the rivet lines on both leading edge skins.
Next, I ordered and received some new Tyco/Amp circular plastic connectors. I'm going to mount one in the stall warning bay of the left leading edge. I whipped out a little bracket to hold it:
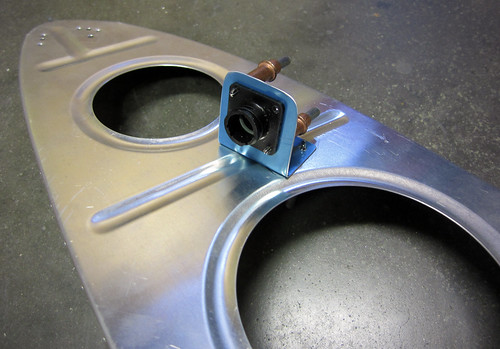
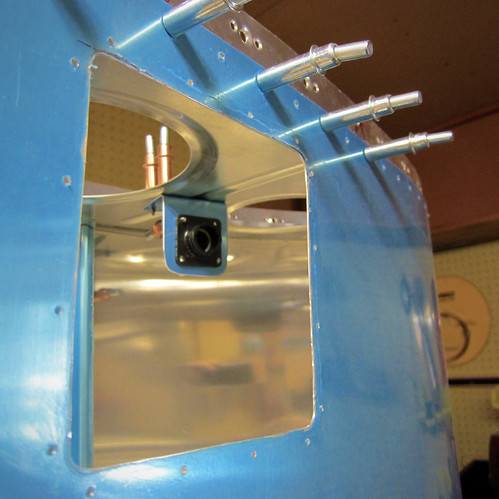
The idea here is that I can wire a full wire harness to this connector from the wing root connector in the wing. If I ever want to wire some extra sensor, camera, etc. out in the wing I can put it in this bay and only have to wire from the sensor to this connector without having to figure out how to get additional wires through the wing itself. Here's a view of where the connector is relative to the access hatch:
That concludes all of the customizations to the leading edges that needed to be fabricated before the disassembly, deburring, and dimpling could begin. I got all of the ribs in the right leading edge deburred and dimpled while I was waiting for the CPC to show up. I also got both of the skins deburred (which seemed to take forever, though in reality it was only two hours). I scuffed them up with Scotchbrite and cleaned them with acetone in preparation for priming, because this step is much easier to accomplish prior to dimpling.
This meant that the skins were ready for dimpling. But they are too unwieldy for me to do by myself. So I lured Bob and Jason from work to my house with the promise of tacos and video games in return for an hour's help dimpling skins. It was a massive success; we were able to knock both skins out quite quickly and move on to more important things like a classic Donkey Kong Tournament (winner: Jason). Sadly, no pictures of the dimpling or the results.
All that is left on the leading edges prior to priming is to debur and dimple the left-side ribs. If I can get the aileron skins dimpled and deburred and figure out how to mount the static wicks on the ailerons, I may do some priming this weekend.
17 Jan 2011
Got a bunch of little things done over the last couple weeks, but sadly there aren't a lot of pictures to show for it. For starters, I finished all of the deburring and dimpling tasks on the leading edges. Nothing really to see there; but as of yesterday they were all ready for chemistry. I also figured out where on the wingtips and ailerons I was going to mount the static wicks. The ailerons will only support a single wick each, using the second stiffener from the outboard end as a doubler.
I went ahead and added nutplate holes for two anchor points to this stiffener and the skin on each side. The remaining two wicks on each wing will be in the wingtip, one right at the inboard edge, and the other a foot or so inside the tip. I'll get some pictures of the mount as I assemble the ailerons.
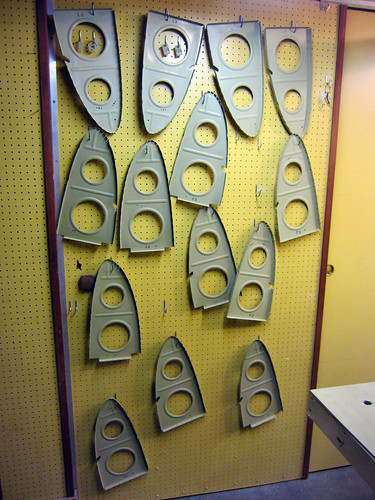
With the small tasks out of the way, it was time to do the first round of surface chemistry and priming. I got started on that today with a long haul day of Alumiprep and Alodine. I started with just the small parts that could be dunked in the chemical storage buckets.
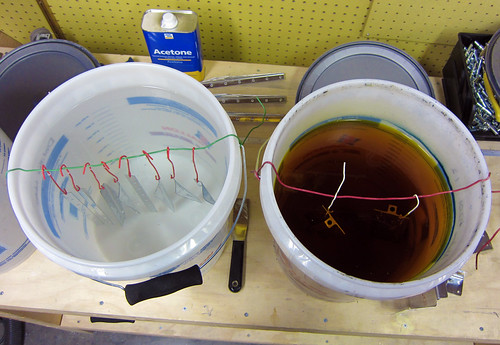
There were so many small parts (32 aileron stiffeners, 8 wing spar extension doublers, all of the landing light bracket parts, and assorted other doo-dads), that this process took me basically the entire day.
All that is left for alodine treatment are the 14 leading edge ribs, the two splice strips, and the two J-stiffeners. These are all too large to be done in the buckets, so I'll have to break out the tupperware bins (and possibly the long dunk tank for the stiffeners). This will have to wait for another day. And then I can prime.
22 Jan 2011
Priming!
A couple of quick tasks before the first priming pass for the wings was done. Started by removing the vinyl from the outer surface rivet lines, deburring, scuffing and dimpling the aileron skins, then masking off the trailing edge so that the eventual Proseal could adhere better to the metal.
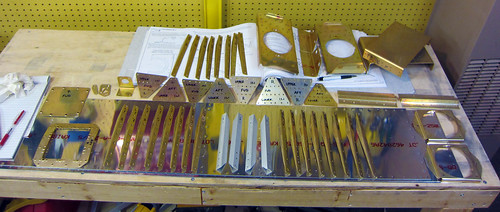
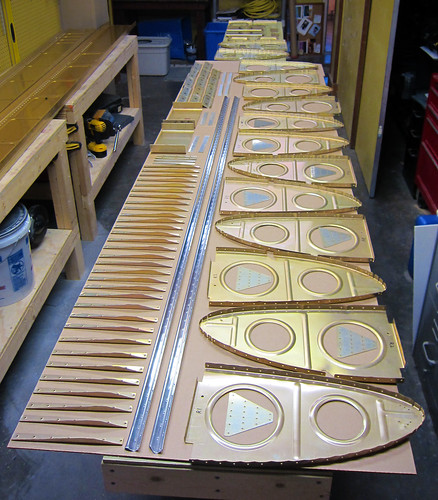
Then I reconfigured the shop for priming and laid out all of the parts on the central table.
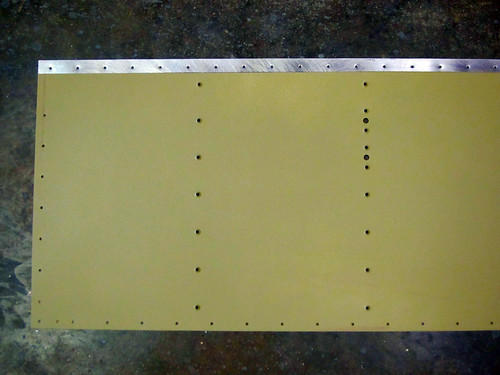
After hanging up the plastic walls, setting up the door ventillation, and waiting the 30 minutes for the freshly mixed primer to do whatever it does during the required wait, the priming itself went very quickly. I was able to do all of the non-skin pieces except the skins and the splice strips in one pass, then all of the skins except one in a second pass, then the final skin and the splice strips in a third pass.
Here's a shot of the result of the aileron skin masking, also showing the modified holes for the static wick:
I left the parts out to dry overnight (and to de-stink the shop, which was almost intolerable with all of the aerosolized solvent all over the place). Very excited to be ready to rivet again!
23 Jan 2011
Right main spar marathon.
The first thing I did today was to put together the stall warning vane assembly, just because it was easy and quick.
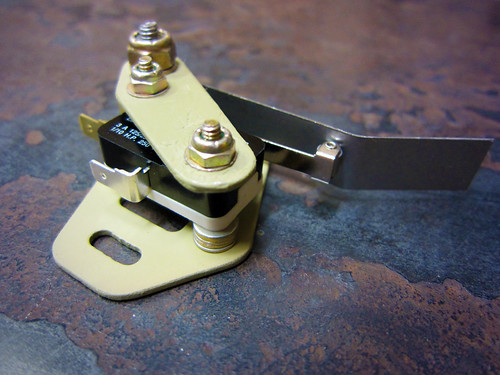
It probably won't get attached to the leading edge until the riveting of the ribs to the skin is complete, so for now it goes on the shelf.
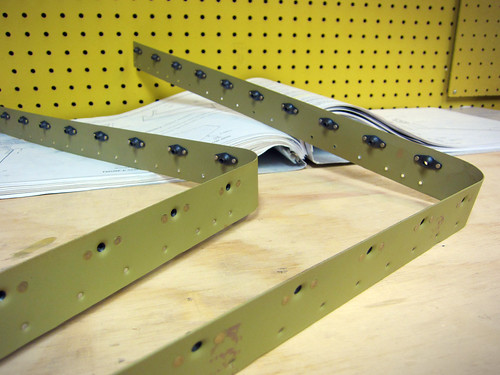
Then, it was time for some riveting. I decided to go back to the first chapter of the wing kit, the main spar, and continue again where I had paused pending priming. This meant riveting the spar extensions and doubler plates in place.
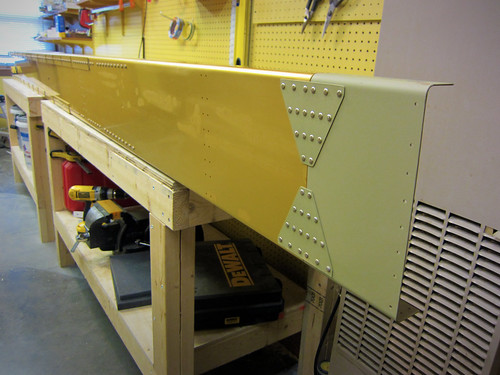
These all required the gun and bucking bar, but were easy enough to do by myself. I did the extensions for both spars. I decided to continue onwards with the main spar chapter, doing the right spar first since it was the one still sitting on my workbench. The next step was to match drill the holes in the wing box J-stiffeners.
This was pretty straightforward and took less time than I thought despite the multitude of holes.
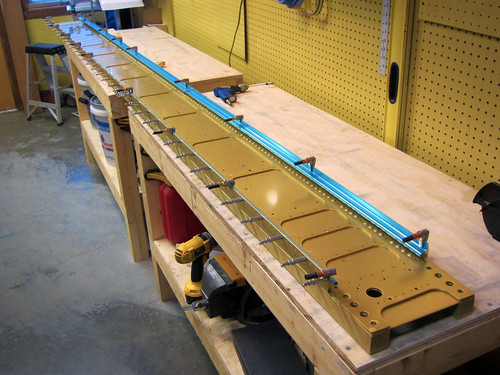
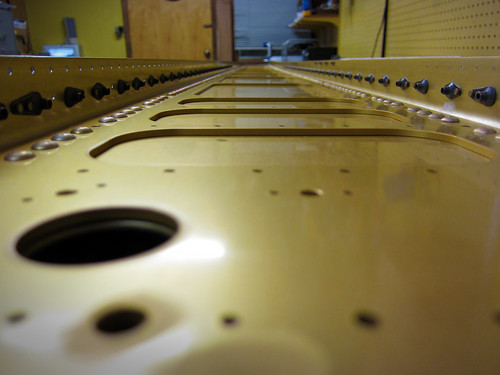
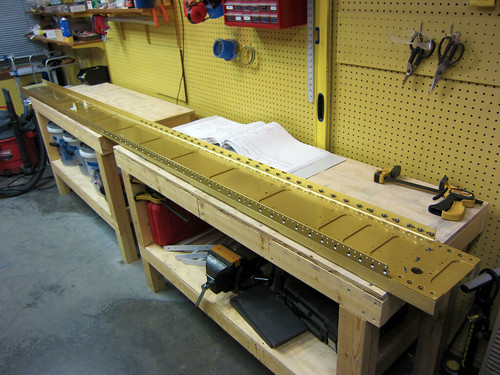
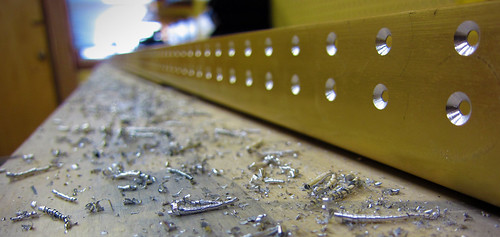
Speaking of holes, the next few steps were all about countersinking. Every single hole in the flange of the spar gets countersunk (except, I think, the "extra hole" in the bottom of the extension on each side). That's about 52 linear feet of flange with a couple holes per inch. This took forever, and I only did one of the spars. The outcome, however, was awesome.
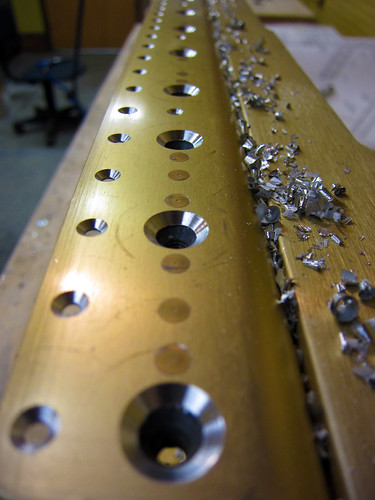
In the above shot you can see that I've already put in the fuel tank attach nutplates as well, so the flanges are basically complete here. The only task remaining on them is to spot-prime those enormous countersinks. I haven't decided how I'm going to do that yet, and it isn't critical path until the time comes to attach the leading edge to the spar (which is a long way off), so I'm tabling that step for now.
Here's another view where you can see the plethora of nutplates:
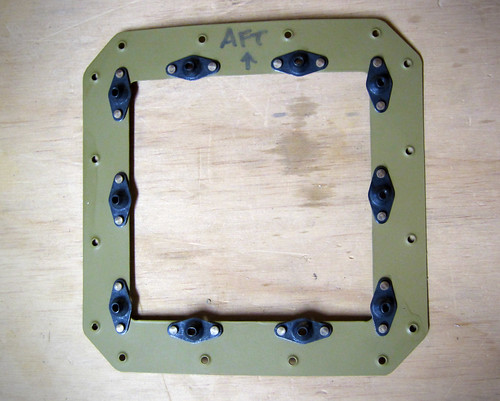
I spent most of the day between the flange nutplates and the countersinking. When that was all done, there was a short encore for the wing root area, where there just five more nutplates to do and three random rivets.
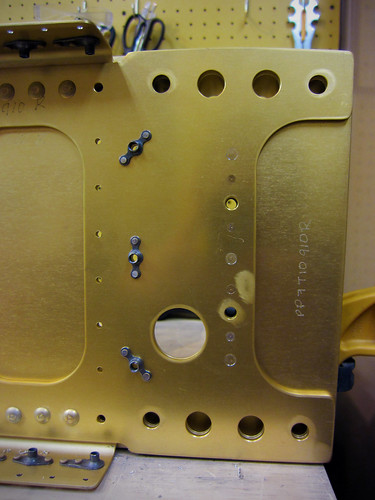
For the life of me, I couldn't find where in the plans it says to actually attach the "wing attach nutplates" on the right side of this image. The diagram shows them going on here, but the text does not. As you can see, I went ahead and put them on. I hope that doesn't bite me in the ass when it comes time for wing attach, later...
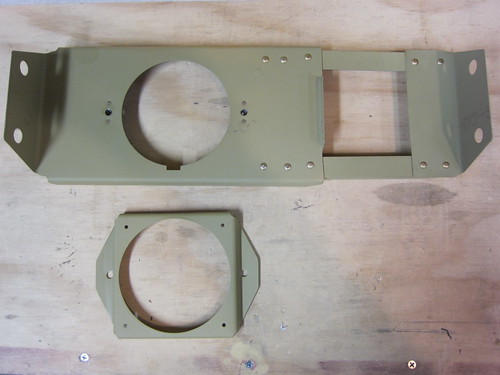
The last little bit of work involves the tie down block and aileron bellcrank bracket. These were quick to install. Here's the brackets:
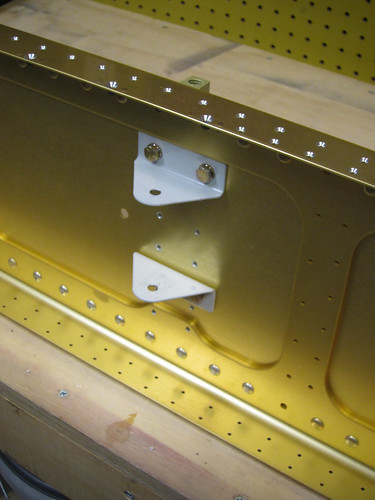
And here's the tie-down:
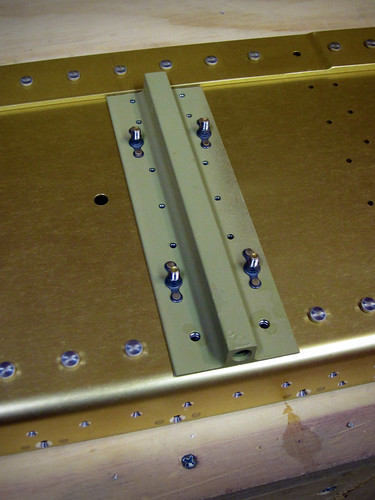
As you can see, I neglected to actually do the rivets. I got so excited about being done with one of the spars that I put away all my tools before realizing I hadn't finished this step. Oh well, I'll finish that up next time. It's just 10 rivets anyway. Here's the final shot of the essentially-done spar:
Tim Olson was right when he said that this section was a bit frustrating in that you do tons of work and in the end it doesn't look much different. The bits that are obviously different (the extensions and the tie down/bellcrank bracket) were by far the quickest to do. Oh well. I'm still pumped to have this behind me.
26 Jan 2011
Preparing the right leading edge for final riveting.
Not wanting to dive into another eight hours of countersinking for the second main spar, I decided to take a break from that and do a leading edge instead. First I did the preparatory steps of adding nutplates to several pieces. First up were the splice strips:
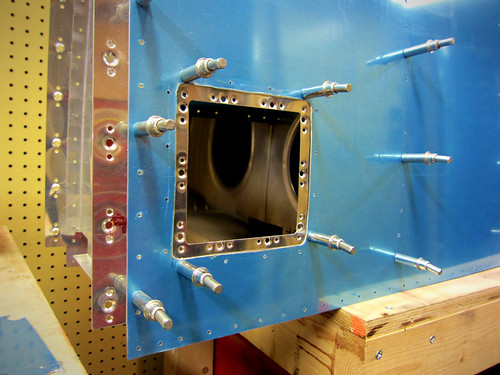
Here's the access hatch doubler for the stall warning system. I found it odd that the nutplates hung out over the lip of it... whatever.
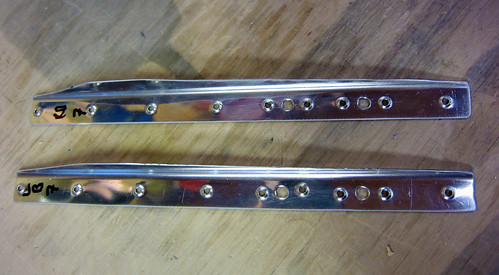
I also added the nutplates in the outboard two ribs which will support the Duckworks landing light brackets:

While I was at it, I went ahead and riveted together the landing light brackets themselves:
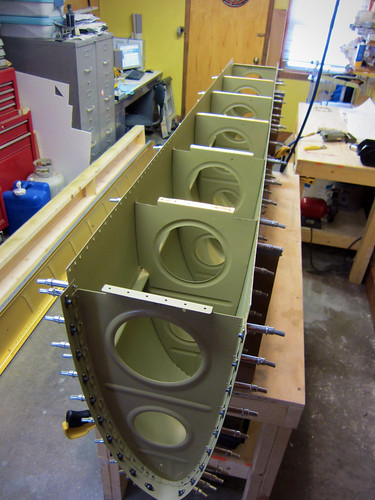
With that, all the preparatory work was done so I went ahead and set up the cradle. Assembling the 10 pieces that make up the leading edge assembly goes really fast when the skins are dimpled, there is a lot less hunting for alignment of the ribs.
I was able to do the aft-most two holes on each side of each rib with the squeezer, so I started with that. I also went ahead and squeezed the entire inboard rib (with the splice strip). After that, it was time to use the gun so I'm going to wait for a helper. Bob was going to come over this evening but something came up, so I'm on hold now.
Of mild-to-no interest... the fourth rib in this leading edge is the 1,000th non-rivet part in the plane.
30 Jan 2011
Still waiting on help with the riveting of the right leading edge, so I set it aside and hauled out the left main spar. Over the last three days I've managed to get it almost complete.
There's nothing significantly different about this one than the right-side one that I did last week, so I didn't take much in the way of pictures. All that is left at this point is to spot-prime the countersunk holes.
I've done a lot of work over the last few days, though most of it was deburring which is super boring and not terribly photogenic.
For starters, I got a prompt reply from the Duckworks folks who informed me that the position of the piece in the last photo of the previous post was accurate, so I went ahead and finished off the two lower lens retainer brackets. I also used the body saw to cut open the stall warning access hatch cover.
The doubler fits perfectly in the opening; I had to modify a couple of the corners to make the access hatch cover fit without modifications. I'd like to be able to use a stock cover in case I ever need to replace it (or need a second one to build a camera or sensor into).
Knowing that dimpling was coming up, I went ahead and removed the vinyl lines from the rivet lines on both leading edge skins.
Next, I ordered and received some new Tyco/Amp circular plastic connectors. I'm going to mount one in the stall warning bay of the left leading edge. I whipped out a little bracket to hold it:
The idea here is that I can wire a full wire harness to this connector from the wing root connector in the wing. If I ever want to wire some extra sensor, camera, etc. out in the wing I can put it in this bay and only have to wire from the sensor to this connector without having to figure out how to get additional wires through the wing itself. Here's a view of where the connector is relative to the access hatch:
That concludes all of the customizations to the leading edges that needed to be fabricated before the disassembly, deburring, and dimpling could begin. I got all of the ribs in the right leading edge deburred and dimpled while I was waiting for the CPC to show up. I also got both of the skins deburred (which seemed to take forever, though in reality it was only two hours). I scuffed them up with Scotchbrite and cleaned them with acetone in preparation for priming, because this step is much easier to accomplish prior to dimpling.
This meant that the skins were ready for dimpling. But they are too unwieldy for me to do by myself. So I lured Bob and Jason from work to my house with the promise of tacos and video games in return for an hour's help dimpling skins. It was a massive success; we were able to knock both skins out quite quickly and move on to more important things like a classic Donkey Kong Tournament (winner: Jason). Sadly, no pictures of the dimpling or the results.
All that is left on the leading edges prior to priming is to debur and dimple the left-side ribs. If I can get the aileron skins dimpled and deburred and figure out how to mount the static wicks on the ailerons, I may do some priming this weekend.
17 Jan 2011
Got a bunch of little things done over the last couple weeks, but sadly there aren't a lot of pictures to show for it. For starters, I finished all of the deburring and dimpling tasks on the leading edges. Nothing really to see there; but as of yesterday they were all ready for chemistry. I also figured out where on the wingtips and ailerons I was going to mount the static wicks. The ailerons will only support a single wick each, using the second stiffener from the outboard end as a doubler.
I went ahead and added nutplate holes for two anchor points to this stiffener and the skin on each side. The remaining two wicks on each wing will be in the wingtip, one right at the inboard edge, and the other a foot or so inside the tip. I'll get some pictures of the mount as I assemble the ailerons.
With the small tasks out of the way, it was time to do the first round of surface chemistry and priming. I got started on that today with a long haul day of Alumiprep and Alodine. I started with just the small parts that could be dunked in the chemical storage buckets.
There were so many small parts (32 aileron stiffeners, 8 wing spar extension doublers, all of the landing light bracket parts, and assorted other doo-dads), that this process took me basically the entire day.
All that is left for alodine treatment are the 14 leading edge ribs, the two splice strips, and the two J-stiffeners. These are all too large to be done in the buckets, so I'll have to break out the tupperware bins (and possibly the long dunk tank for the stiffeners). This will have to wait for another day. And then I can prime.
22 Jan 2011
Priming!
A couple of quick tasks before the first priming pass for the wings was done. Started by removing the vinyl from the outer surface rivet lines, deburring, scuffing and dimpling the aileron skins, then masking off the trailing edge so that the eventual Proseal could adhere better to the metal.
Then I reconfigured the shop for priming and laid out all of the parts on the central table.
After hanging up the plastic walls, setting up the door ventillation, and waiting the 30 minutes for the freshly mixed primer to do whatever it does during the required wait, the priming itself went very quickly. I was able to do all of the non-skin pieces except the skins and the splice strips in one pass, then all of the skins except one in a second pass, then the final skin and the splice strips in a third pass.
Here's a shot of the result of the aileron skin masking, also showing the modified holes for the static wick:
I left the parts out to dry overnight (and to de-stink the shop, which was almost intolerable with all of the aerosolized solvent all over the place). Very excited to be ready to rivet again!
23 Jan 2011
Right main spar marathon.
The first thing I did today was to put together the stall warning vane assembly, just because it was easy and quick.
It probably won't get attached to the leading edge until the riveting of the ribs to the skin is complete, so for now it goes on the shelf.
Then, it was time for some riveting. I decided to go back to the first chapter of the wing kit, the main spar, and continue again where I had paused pending priming. This meant riveting the spar extensions and doubler plates in place.
These all required the gun and bucking bar, but were easy enough to do by myself. I did the extensions for both spars. I decided to continue onwards with the main spar chapter, doing the right spar first since it was the one still sitting on my workbench. The next step was to match drill the holes in the wing box J-stiffeners.
This was pretty straightforward and took less time than I thought despite the multitude of holes.
Speaking of holes, the next few steps were all about countersinking. Every single hole in the flange of the spar gets countersunk (except, I think, the "extra hole" in the bottom of the extension on each side). That's about 52 linear feet of flange with a couple holes per inch. This took forever, and I only did one of the spars. The outcome, however, was awesome.
In the above shot you can see that I've already put in the fuel tank attach nutplates as well, so the flanges are basically complete here. The only task remaining on them is to spot-prime those enormous countersinks. I haven't decided how I'm going to do that yet, and it isn't critical path until the time comes to attach the leading edge to the spar (which is a long way off), so I'm tabling that step for now.
Here's another view where you can see the plethora of nutplates:
I spent most of the day between the flange nutplates and the countersinking. When that was all done, there was a short encore for the wing root area, where there just five more nutplates to do and three random rivets.
For the life of me, I couldn't find where in the plans it says to actually attach the "wing attach nutplates" on the right side of this image. The diagram shows them going on here, but the text does not. As you can see, I went ahead and put them on. I hope that doesn't bite me in the ass when it comes time for wing attach, later...
The last little bit of work involves the tie down block and aileron bellcrank bracket. These were quick to install. Here's the brackets:
And here's the tie-down:
As you can see, I neglected to actually do the rivets. I got so excited about being done with one of the spars that I put away all my tools before realizing I hadn't finished this step. Oh well, I'll finish that up next time. It's just 10 rivets anyway. Here's the final shot of the essentially-done spar:
Tim Olson was right when he said that this section was a bit frustrating in that you do tons of work and in the end it doesn't look much different. The bits that are obviously different (the extensions and the tie down/bellcrank bracket) were by far the quickest to do. Oh well. I'm still pumped to have this behind me.
26 Jan 2011
Preparing the right leading edge for final riveting.
Not wanting to dive into another eight hours of countersinking for the second main spar, I decided to take a break from that and do a leading edge instead. First I did the preparatory steps of adding nutplates to several pieces. First up were the splice strips:
Here's the access hatch doubler for the stall warning system. I found it odd that the nutplates hung out over the lip of it... whatever.
I also added the nutplates in the outboard two ribs which will support the Duckworks landing light brackets:
While I was at it, I went ahead and riveted together the landing light brackets themselves:
With that, all the preparatory work was done so I went ahead and set up the cradle. Assembling the 10 pieces that make up the leading edge assembly goes really fast when the skins are dimpled, there is a lot less hunting for alignment of the ribs.
I was able to do the aft-most two holes on each side of each rib with the squeezer, so I started with that. I also went ahead and squeezed the entire inboard rib (with the splice strip). After that, it was time to use the gun so I'm going to wait for a helper. Bob was going to come over this evening but something came up, so I'm on hold now.
Of mild-to-no interest... the fourth rib in this leading edge is the 1,000th non-rivet part in the plane.
30 Jan 2011
Still waiting on help with the riveting of the right leading edge, so I set it aside and hauled out the left main spar. Over the last three days I've managed to get it almost complete.
There's nothing significantly different about this one than the right-side one that I did last week, so I didn't take much in the way of pictures. All that is left at this point is to spot-prime the countersunk holes.
| <-- December 2010 | February 2011 --> |