
| Workshop | Empennage | Wings | Fuselage | Contact |
| <-- January 2013 | March 2013 --> |
Chronological Updates, February, 2013
10 Feb 2013
I've been trying to find someone in the area that carries #9 lead shot so that I can get to work on panel-beating the small dents out of the right fuel tank before closing it up. There isn't much left to do on that tank prior to putting the aft baffle on and all of the parts are now here, so I'm basically held up behind fixing the dents.
So this morning I gave up and just ordered some shot from Amazon. Sadly, free Prime shipping was not available. And shipping on a 25 pound bag of lead is... not cheap. But soon I'll have everything I need to finish up the right tank.
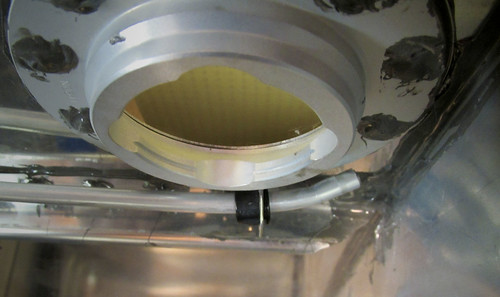
In the meantime, I set to work on the second iteration of the left tank leak check. I had done a first round previously, but it turned out that the seal between my vent fitting and the manometer tube was no good so it wasn't much of a test. This time I got some vacuum grease from Bob and smeared it all over the threads to the vent fitting. This kept any air from leaking out and easily held back one PSI.
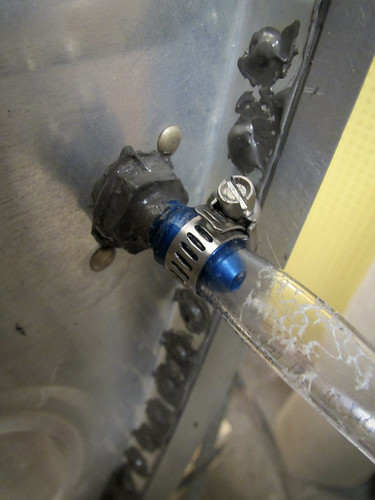
I used a bike pump and the valve fitting that Van's sells in the drain hole to pressurize the tank up to 1 PSI (~27" of water). I made a soap solution with about 1 Tbsp. of dish soap in a liter of water and put it in a spray bottle and liberally sprayed all rivets and connection joints on the fuel tank while it was pressurized. There was one immediately-obvious leak coming from a pinhole between the aft baffle and the top skin flange.

I wasn't sure how much bubbling I was supposed to be looking for, but this one made large bubbles very quickly so it made me more confident about all the skin rivets and other joints that had no discrenable bubbling at all. The good news is that this leak is A) not on the outer skin and B) in a place that easy to fix. I should be able to just dab some sealant over the pinhole and be done with it.
The only other "leak" I found was a similar one at the plugged fuel outlet fitting. I think this is just because this fitting has no grease in it and the plug isn't perfect. It looks like the bubbles are coming from the threads and now the sealed rivets nearby. I'll check it more carefully when I do the third pressure test of the tank after fixin the pinhole on the aft baffle.
Here's a video showing the basic manometer setup and the bubbling leak:
Although having a leak is worse than not having a leak, I'm glad it's such an easy one to fix.
23 Feb 2013
I finally got my lead shot and was able to panel-beat the small dents in the right tank skin out of existence. That was the big hold up on progress for this tank, so I got a lot done this weekend finally.
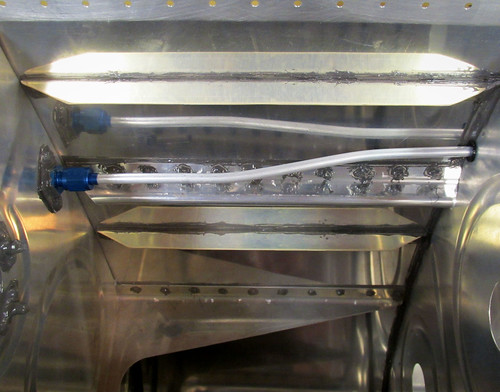
In preparation for riveting in the aft inboard rib, I put the finishing bends on the vent line. First, I bent the outboard end up to maximize usable fuel volume in the tank:
At the inboard end, I put the bends necessary for the vent tube to align with the bulkhead fitting without any stress:
Next, I dry-fit the aft inboard rib with the fuel level capacitance probe attached to make sure the bends in the probe were good.
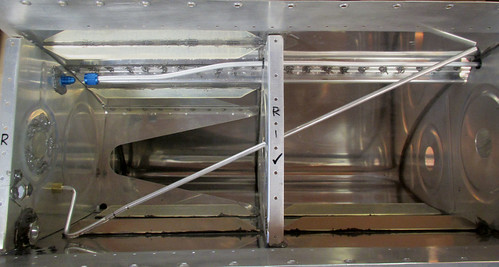
For some reason I bent this one slightly differently than the one in the left tank. This one has the 135° bend aft of the stiffener, which makes it hard to angle the tube up towards the aft upper corner of the second bay. I recommend not doing these the way shown here, and instead bend them the way I did in the left tank which gets a slightly better high end point.
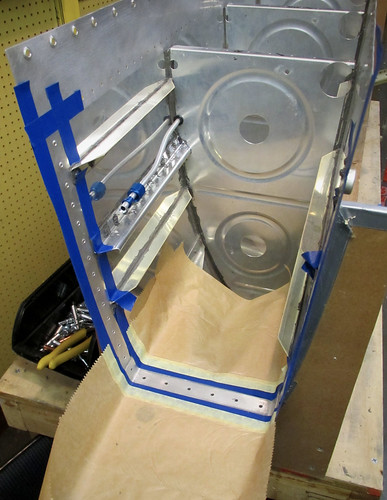
Next on the hit parade was to mask up the aft inboard rib area for riveting.
Because I knew I was going to be doing a round of sealant, and that I needed to put some sealant on the leak on the left tank, I first tried to get some Loctite to wick into the pinhole.
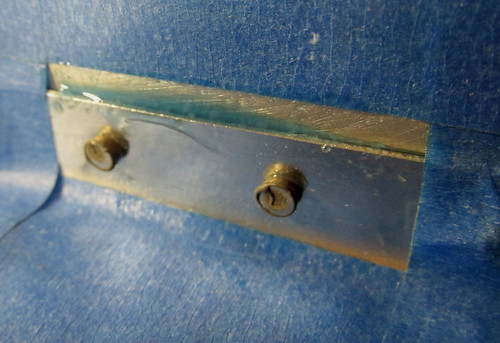
I put this line of blue Loctite across the area that was bubbling during the pressure test, then drew a slight negative pressure on the tank. There was no clear indication that any perceptible volume of Loctite was being drawn into the pinhole. I let it dry for a couple hours then wiped off the bulk of what you can see here. When I mixed the sealant for the right tank aft inboard rib, I put a small line of it across the leak area. Unfortunately, after a few hours I could see a small pinhole in the sealant right where the old leak was. So I'm not sure I've accomplished anything yet. I'll do another line of sealant here when I next mix a batch.
Riveting on the aft inboard rib was straightforward solo as all the skin rivets can be done with a squeezer (though one of them behind the vent bulkhead fitting required a narrow-nose yoke in the squeezer).
I did all of the skin rivets but passed on the attachment bulkhead rivets for now. I also ran out of sealant before I got all of the joints filleted or rivet heads covered. I'll leave it like this for now and do a second batch of 10g of sealant to hopefully finish off the goodies on the inside of the tank and be ready for attaching the aft bulkhead. Just for my own reference, here's what I need to put sealant on before closing up the tank:
28 Feb 2013
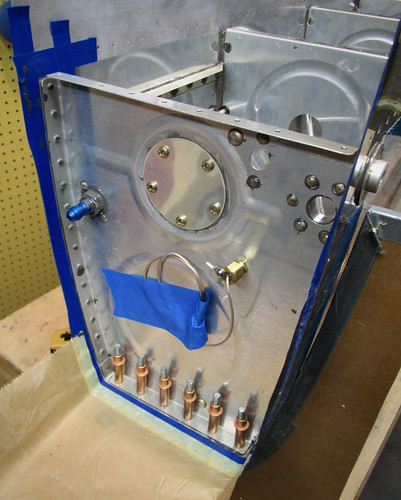
In the last couple of days I've gotten the sealant done on the innards of the right fuel tank. I installed the Fuel Guardian sensor and got it sealed in, torqued up the vent line to the bulkhead fitting and sealed it up, sealed up the fuel level sensor, and added standoffs of sealant everywhere where the capacitance probe comes near a metal surface. Finally, I did the six rivets that connect the inboard rib halves to the forward tank attach bracket. Now I have to wait for awhile for the sealant to cure before I do the red water leak test.
Meanwhile, the left tank has that little spot of new sealant over where the leak was, and I want it to cure good and strong before I do another pressure test on it. So both fuel tanks are somewhat out of commission for awhile.
Not wanting to sit idly, I pulled out the nose assembly for the left aileron and riveted the top skin onto it:

43 quick rivets, easy to solo.
I've been trying to find someone in the area that carries #9 lead shot so that I can get to work on panel-beating the small dents out of the right fuel tank before closing it up. There isn't much left to do on that tank prior to putting the aft baffle on and all of the parts are now here, so I'm basically held up behind fixing the dents.
So this morning I gave up and just ordered some shot from Amazon. Sadly, free Prime shipping was not available. And shipping on a 25 pound bag of lead is... not cheap. But soon I'll have everything I need to finish up the right tank.
In the meantime, I set to work on the second iteration of the left tank leak check. I had done a first round previously, but it turned out that the seal between my vent fitting and the manometer tube was no good so it wasn't much of a test. This time I got some vacuum grease from Bob and smeared it all over the threads to the vent fitting. This kept any air from leaking out and easily held back one PSI.
I used a bike pump and the valve fitting that Van's sells in the drain hole to pressurize the tank up to 1 PSI (~27" of water). I made a soap solution with about 1 Tbsp. of dish soap in a liter of water and put it in a spray bottle and liberally sprayed all rivets and connection joints on the fuel tank while it was pressurized. There was one immediately-obvious leak coming from a pinhole between the aft baffle and the top skin flange.
I wasn't sure how much bubbling I was supposed to be looking for, but this one made large bubbles very quickly so it made me more confident about all the skin rivets and other joints that had no discrenable bubbling at all. The good news is that this leak is A) not on the outer skin and B) in a place that easy to fix. I should be able to just dab some sealant over the pinhole and be done with it.
The only other "leak" I found was a similar one at the plugged fuel outlet fitting. I think this is just because this fitting has no grease in it and the plug isn't perfect. It looks like the bubbles are coming from the threads and now the sealed rivets nearby. I'll check it more carefully when I do the third pressure test of the tank after fixin the pinhole on the aft baffle.
Here's a video showing the basic manometer setup and the bubbling leak:
Although having a leak is worse than not having a leak, I'm glad it's such an easy one to fix.
23 Feb 2013
I finally got my lead shot and was able to panel-beat the small dents in the right tank skin out of existence. That was the big hold up on progress for this tank, so I got a lot done this weekend finally.
In preparation for riveting in the aft inboard rib, I put the finishing bends on the vent line. First, I bent the outboard end up to maximize usable fuel volume in the tank:
At the inboard end, I put the bends necessary for the vent tube to align with the bulkhead fitting without any stress:
Next, I dry-fit the aft inboard rib with the fuel level capacitance probe attached to make sure the bends in the probe were good.
For some reason I bent this one slightly differently than the one in the left tank. This one has the 135° bend aft of the stiffener, which makes it hard to angle the tube up towards the aft upper corner of the second bay. I recommend not doing these the way shown here, and instead bend them the way I did in the left tank which gets a slightly better high end point.
Next on the hit parade was to mask up the aft inboard rib area for riveting.
Because I knew I was going to be doing a round of sealant, and that I needed to put some sealant on the leak on the left tank, I first tried to get some Loctite to wick into the pinhole.
I put this line of blue Loctite across the area that was bubbling during the pressure test, then drew a slight negative pressure on the tank. There was no clear indication that any perceptible volume of Loctite was being drawn into the pinhole. I let it dry for a couple hours then wiped off the bulk of what you can see here. When I mixed the sealant for the right tank aft inboard rib, I put a small line of it across the leak area. Unfortunately, after a few hours I could see a small pinhole in the sealant right where the old leak was. So I'm not sure I've accomplished anything yet. I'll do another line of sealant here when I next mix a batch.
Riveting on the aft inboard rib was straightforward solo as all the skin rivets can be done with a squeezer (though one of them behind the vent bulkhead fitting required a narrow-nose yoke in the squeezer).
I did all of the skin rivets but passed on the attachment bulkhead rivets for now. I also ran out of sealant before I got all of the joints filleted or rivet heads covered. I'll leave it like this for now and do a second batch of 10g of sealant to hopefully finish off the goodies on the inside of the tank and be ready for attaching the aft bulkhead. Just for my own reference, here's what I need to put sealant on before closing up the tank:
- Outboard end of the fuel level probe
- Inboard end of the fuel level probe
- 135° bend on the fuel level probe to keep it off the stiffener and skin
- Bulkhead fitting of the vent tube
- Fuel Guardian sensor (not installed yet)
- Finish the rib-to-skin fillets
- Touch up a few pinholes in existing fillets
28 Feb 2013
In the last couple of days I've gotten the sealant done on the innards of the right fuel tank. I installed the Fuel Guardian sensor and got it sealed in, torqued up the vent line to the bulkhead fitting and sealed it up, sealed up the fuel level sensor, and added standoffs of sealant everywhere where the capacitance probe comes near a metal surface. Finally, I did the six rivets that connect the inboard rib halves to the forward tank attach bracket. Now I have to wait for awhile for the sealant to cure before I do the red water leak test.
Meanwhile, the left tank has that little spot of new sealant over where the leak was, and I want it to cure good and strong before I do another pressure test on it. So both fuel tanks are somewhat out of commission for awhile.
Not wanting to sit idly, I pulled out the nose assembly for the left aileron and riveted the top skin onto it:
43 quick rivets, easy to solo.
| <-- January 2013 | March 2013 --> |